Finalize Rental Agreement
After you have provided storage on the UltronGlow Storage Market someone will rent your storage space. Once they accept the rental terms, you must finalize your pledge for the rental agreement and configure a link for the rente3 to be able to access their rented storage space on your server.
This guide provides instructions for how to finalize the rental agreement and configuring the link for the rentee.
Prerequisites
- Complete the Rent Storage on the UltronGlow Storage Marketplace tutorial.
Steps
1. Check if storage is rented
Navigate to Ultronscan and log into your storage server.
If you forgot how to login to your storage server on UltronScan, refer to Connecting to Ultronscan for details
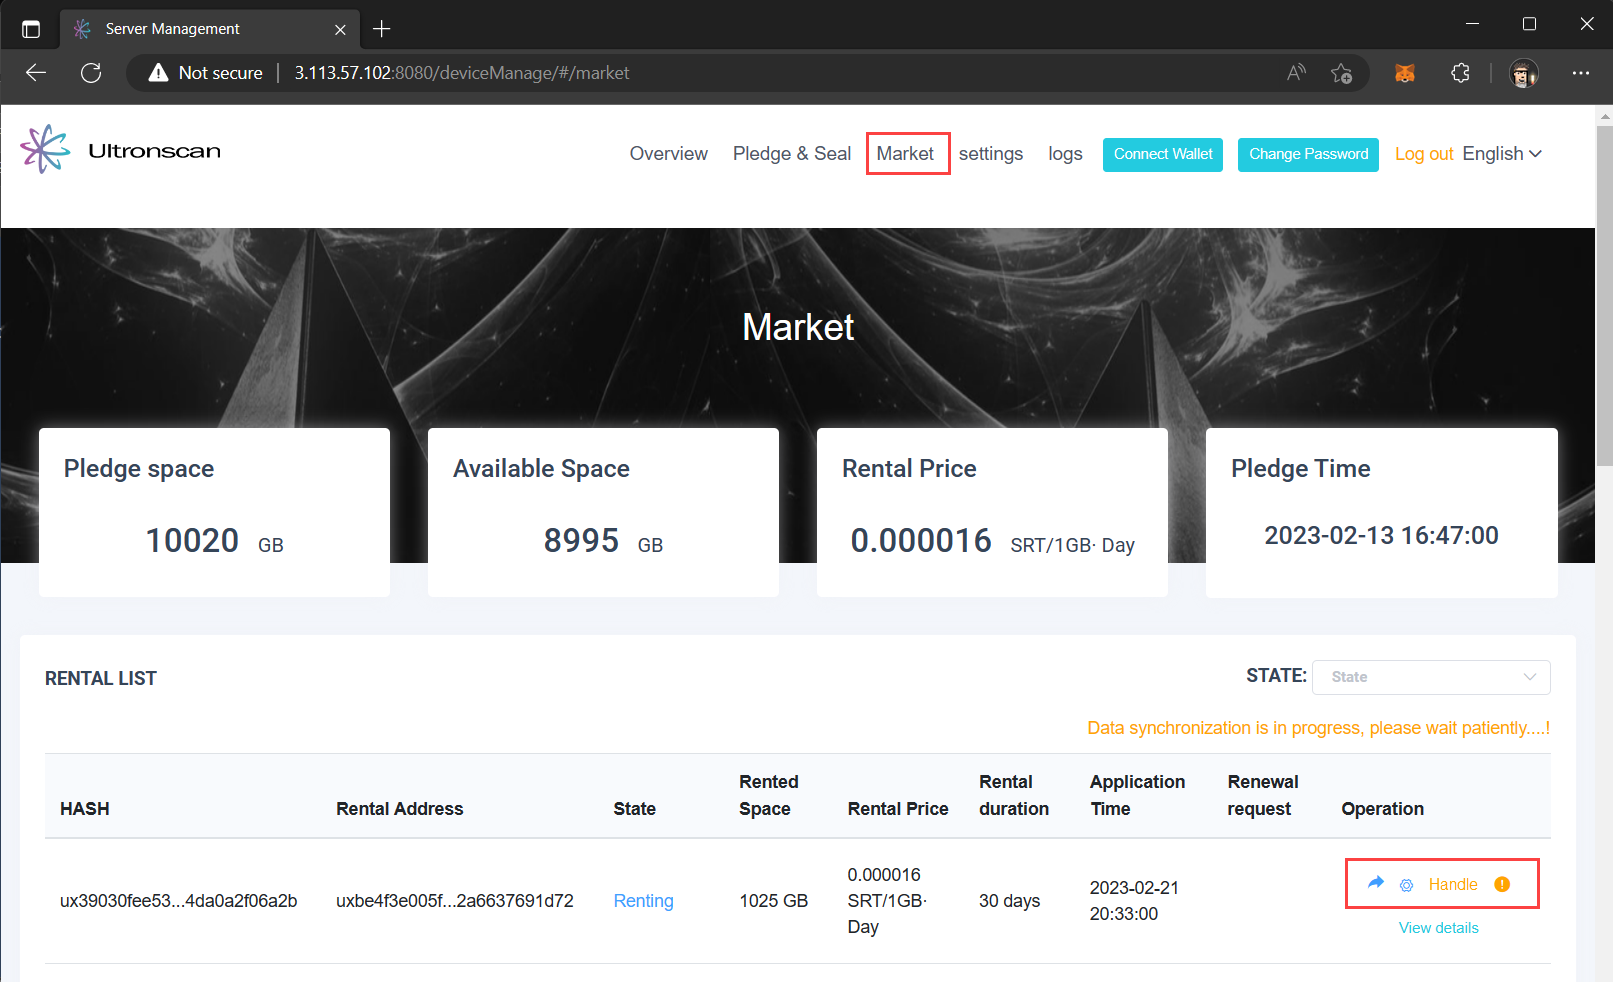
Click on Market.
Check in the lower right-hand of the page under Operation. If the status is listed as Handle with an "!" next to it, click on it to confirm your pledge.
If the status does show Handle, then wait for someone to rent your storage and come back and try again.
You will be asked to confirm your pledge.
2. Configure port-forwarding on your router
You will now need to configure your router to enable the rentee to access your server to store their files. While each router manufacturer has different user experiences for configuring port-forwarding, the below steps will help you in general to determine the settings needed.
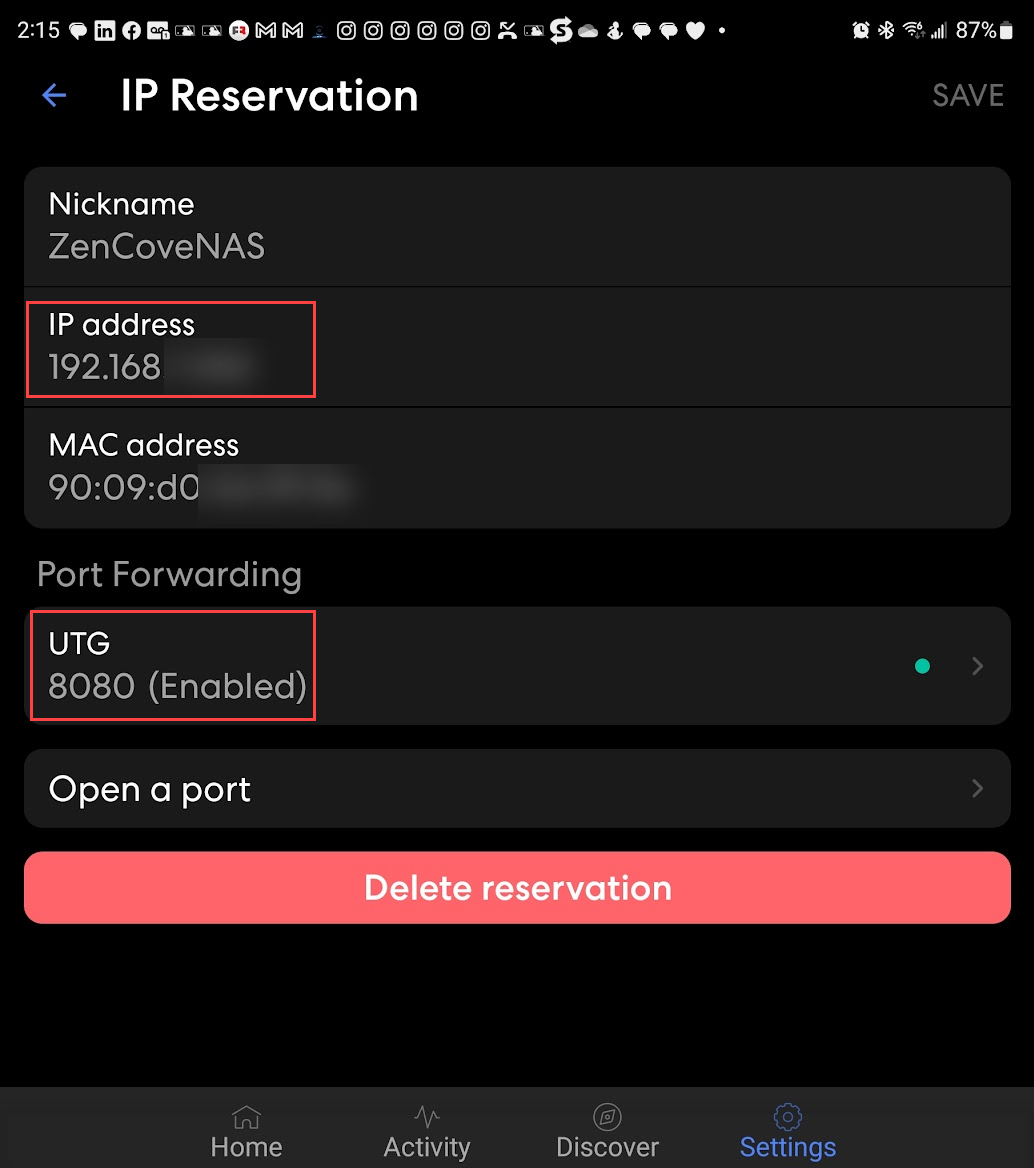
- Determine the IP address of your server.
- In your router's configuration, set-up port-forwarding to forward the IP address of your server to port 8080.
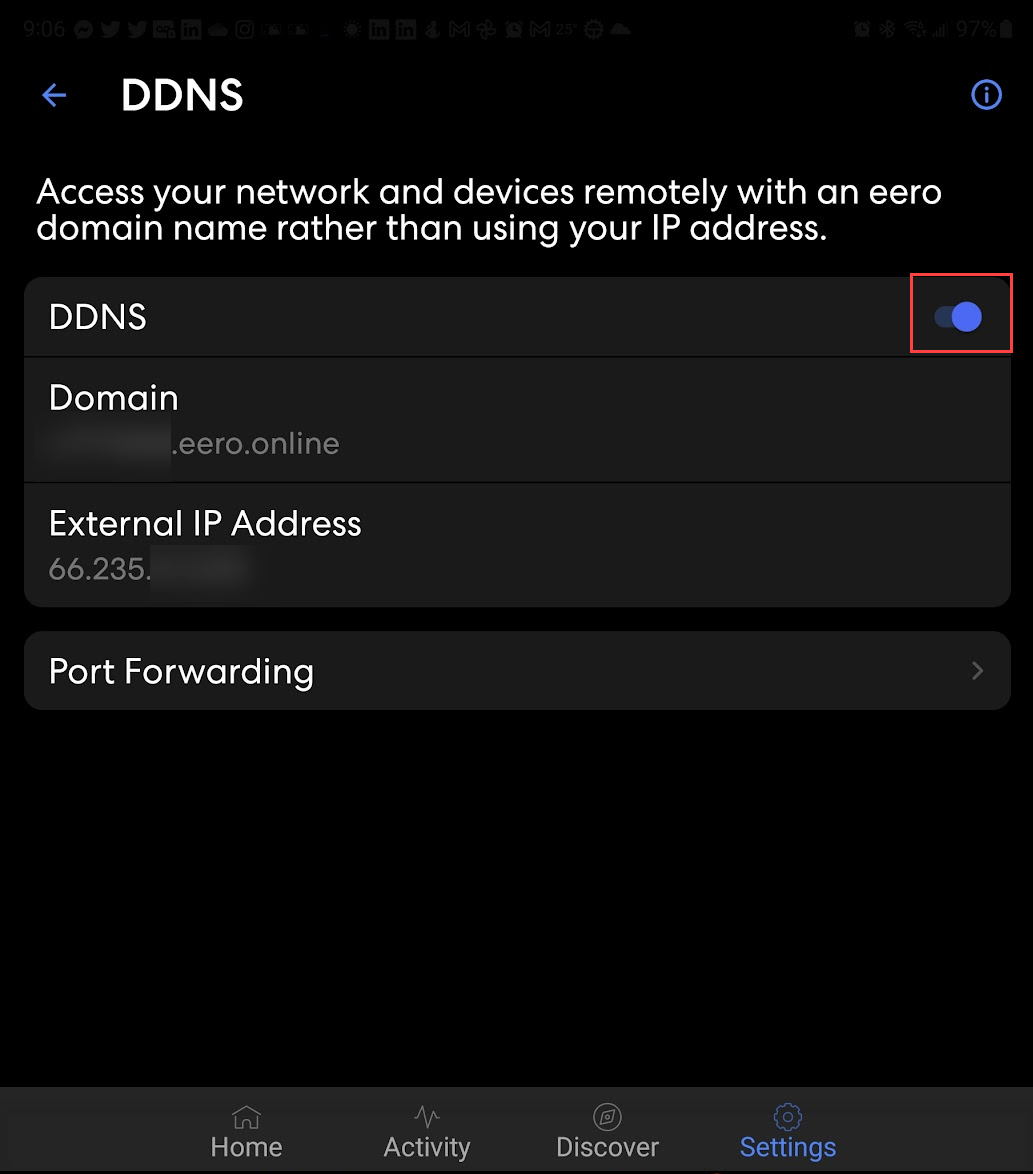
- Enable DDNS (Dynamic DNS) to provide a unique hostname for the public IP address of your router.
In the below example, we are using an Eero mesh Wi-Fi router. In the application to access the Eero router, the IP address is set for port-forwarding to port 8080.
3. Set URL for rentee access
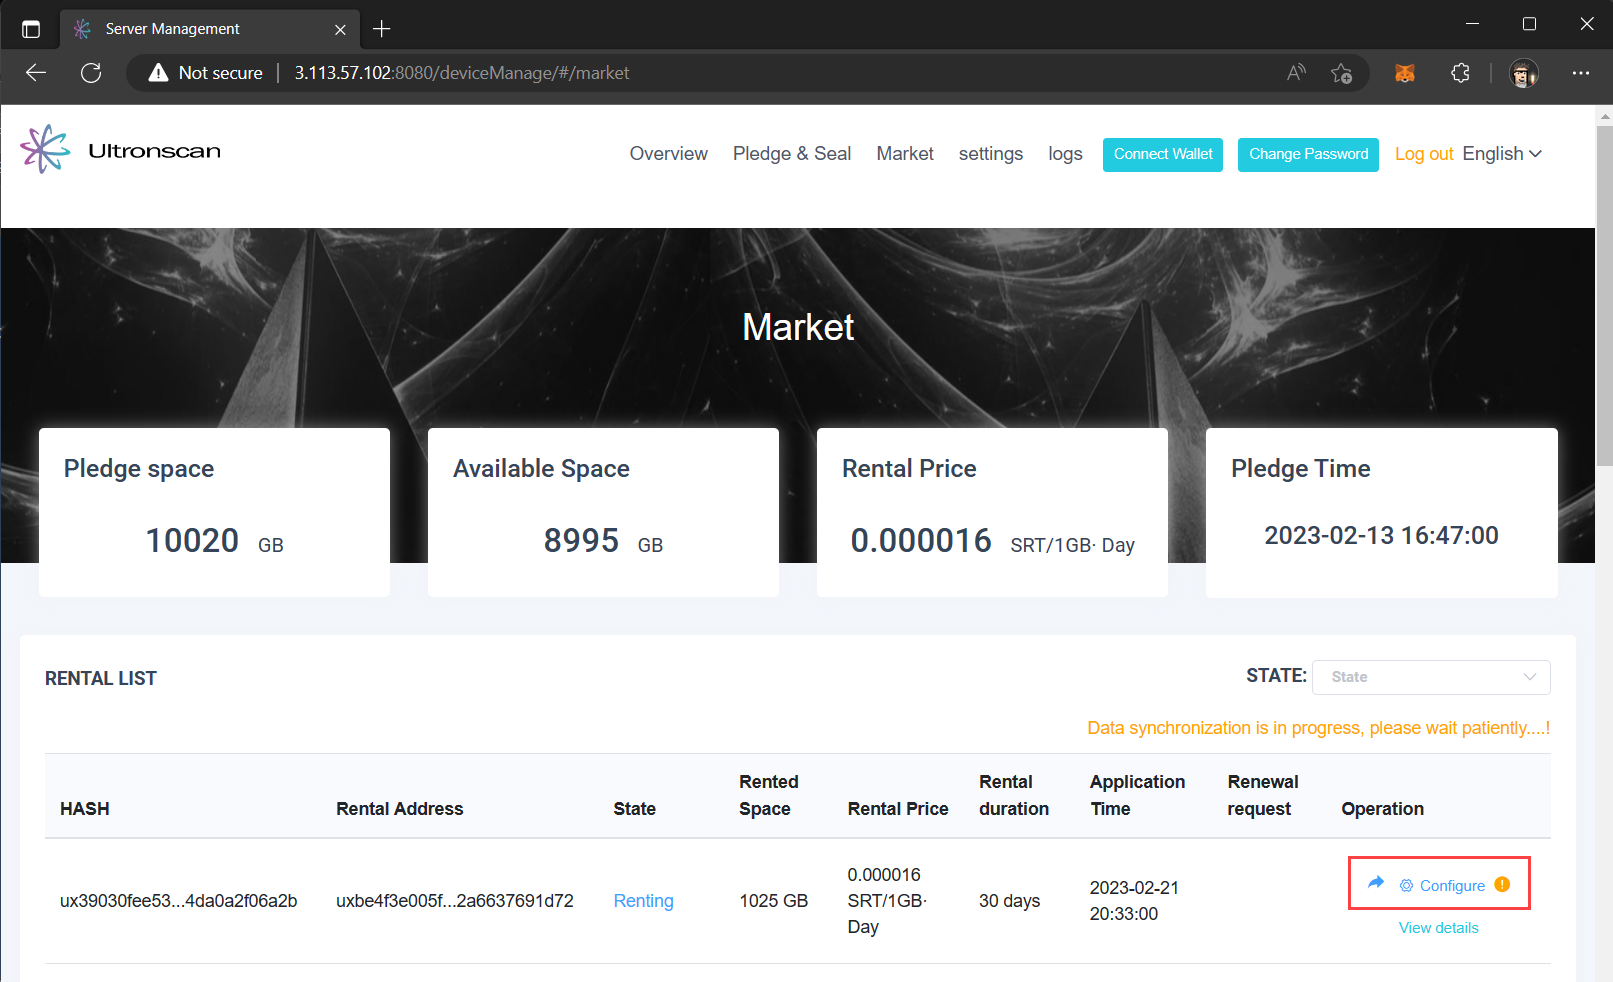
You will see that since you completed your pledge in Step 1, that the Operation status has changed Handle to Configure with an "!" next to it, indicating you need to set the URL for your rentee.
- Click on Configure
In the Upload link page, you are given an option to share an image of the URL address, or to provide a text link directly. In this example, we will use the text link.
- Enter the URL link of the address based on the steps you completed in Step 2 earlier.
The format of the link will be http://<DDNS Hostname>:8080/home
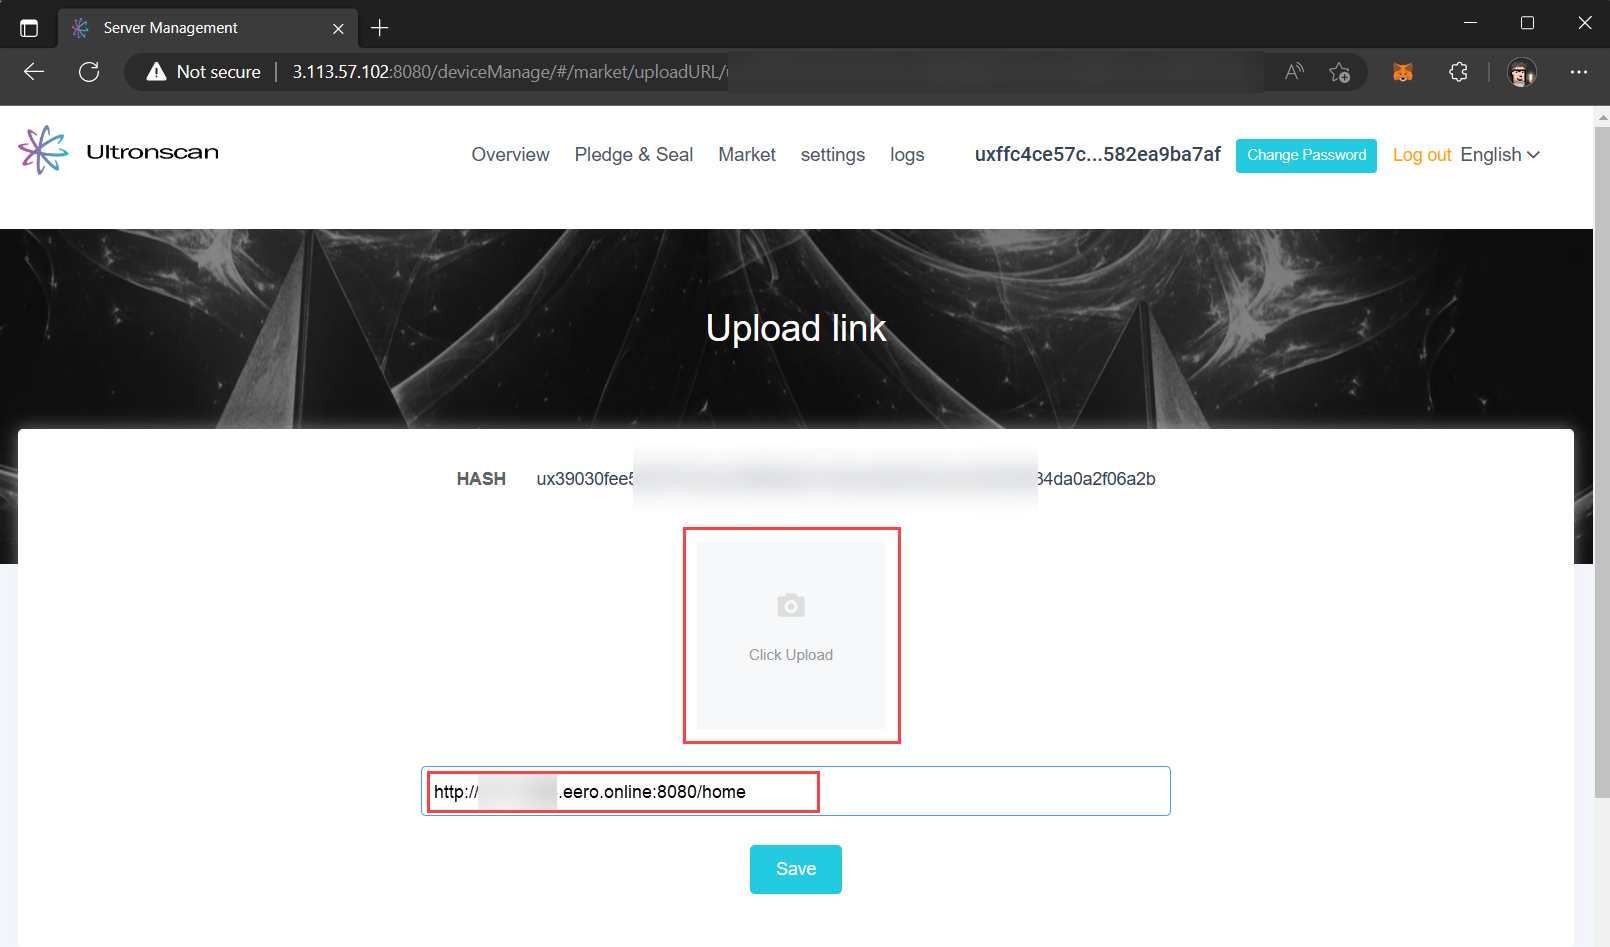
Click the Save button, and you're done!
Next Steps
Congratulations, you've successfully configured the storage for your rentee and they are now able to access your server to store their files securely.
Continue on to the Next Step to rent other's storage on the Storage Market where you can store your data for backup or other purposes!