Setting up your Device
Storage providers on the UltronGlow network utilize containerization technology to provide a seamless way to configure storage for rental, as well as earning rewards for doing so.
This guide provides instructions to configure Docker Desktop, find and download the UltronGlow container from DockerHub, and configure the container appropriately for use on the UltronGlow network.
Before starting, make sure you have followed the below prerequisites in order to be successful.
Prerequisites
- Complete the prerequisites in Getting Started.
Steps
1. Download the UltronGlow Storage Provider Docker image
Once you have Docker Desktop installed on your computer, you will host a container that will run the UltronGlow Storage Provider services that facilitate sharing your storate on the network.
Open the Docker Desktop application on your computer.
Open Images in the left navigation bar.
Change from Local to Hub to search for the UltronGlow image in Docker Hub.
Click on the Search field.
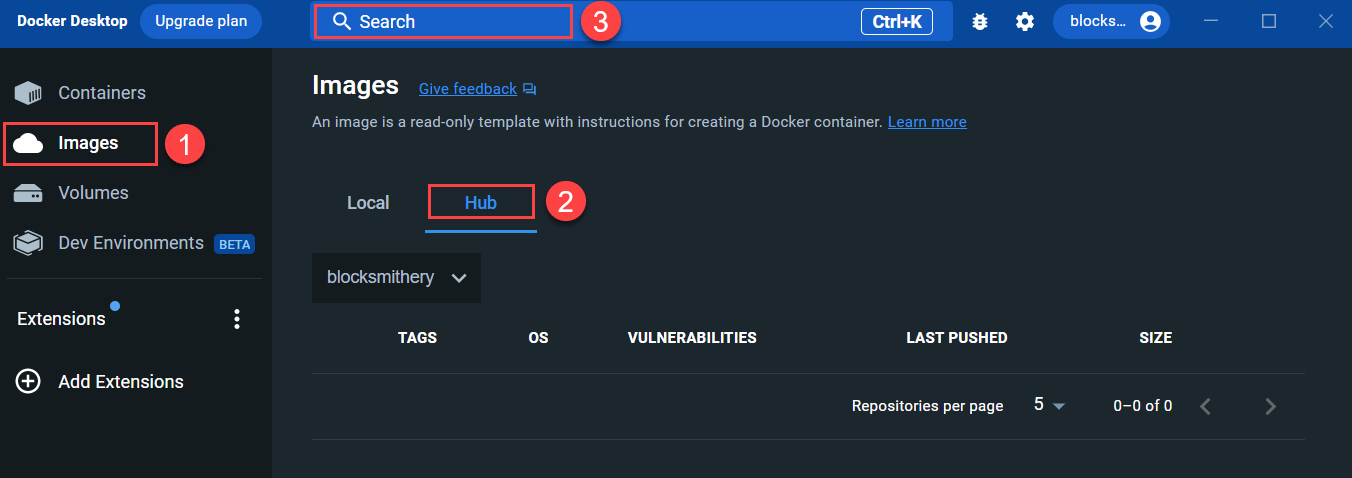
Click on the Images tab to search for the image.
In the Search bar, type utg-ss to find the gordie image.
Once you find the image, click on the Pull button to download the image to your computer.
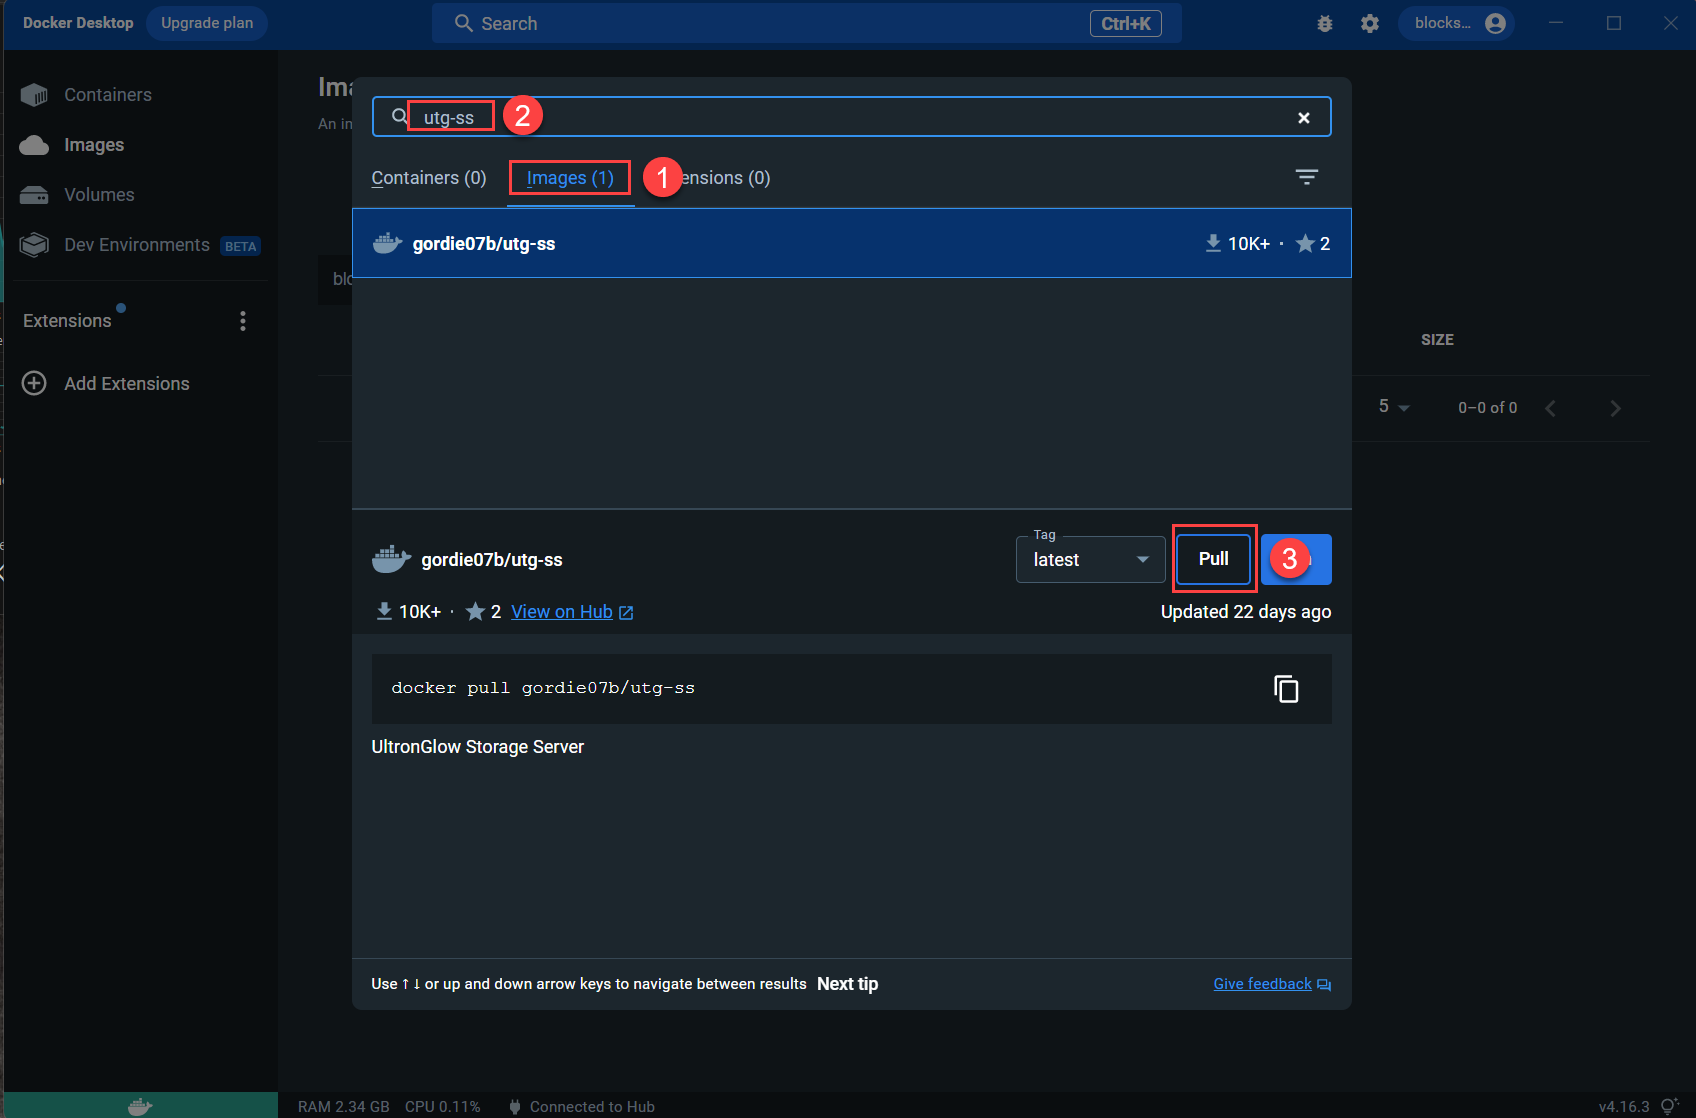
The image will take a few seconds to download to your computer.
2. Configure and run the Docker container
Once the image has downloaded successfully, you will configure the container for your computer which will enable you to offer your storage resources on the UltronGlow storage market.
In Docker Desktop, do the following:
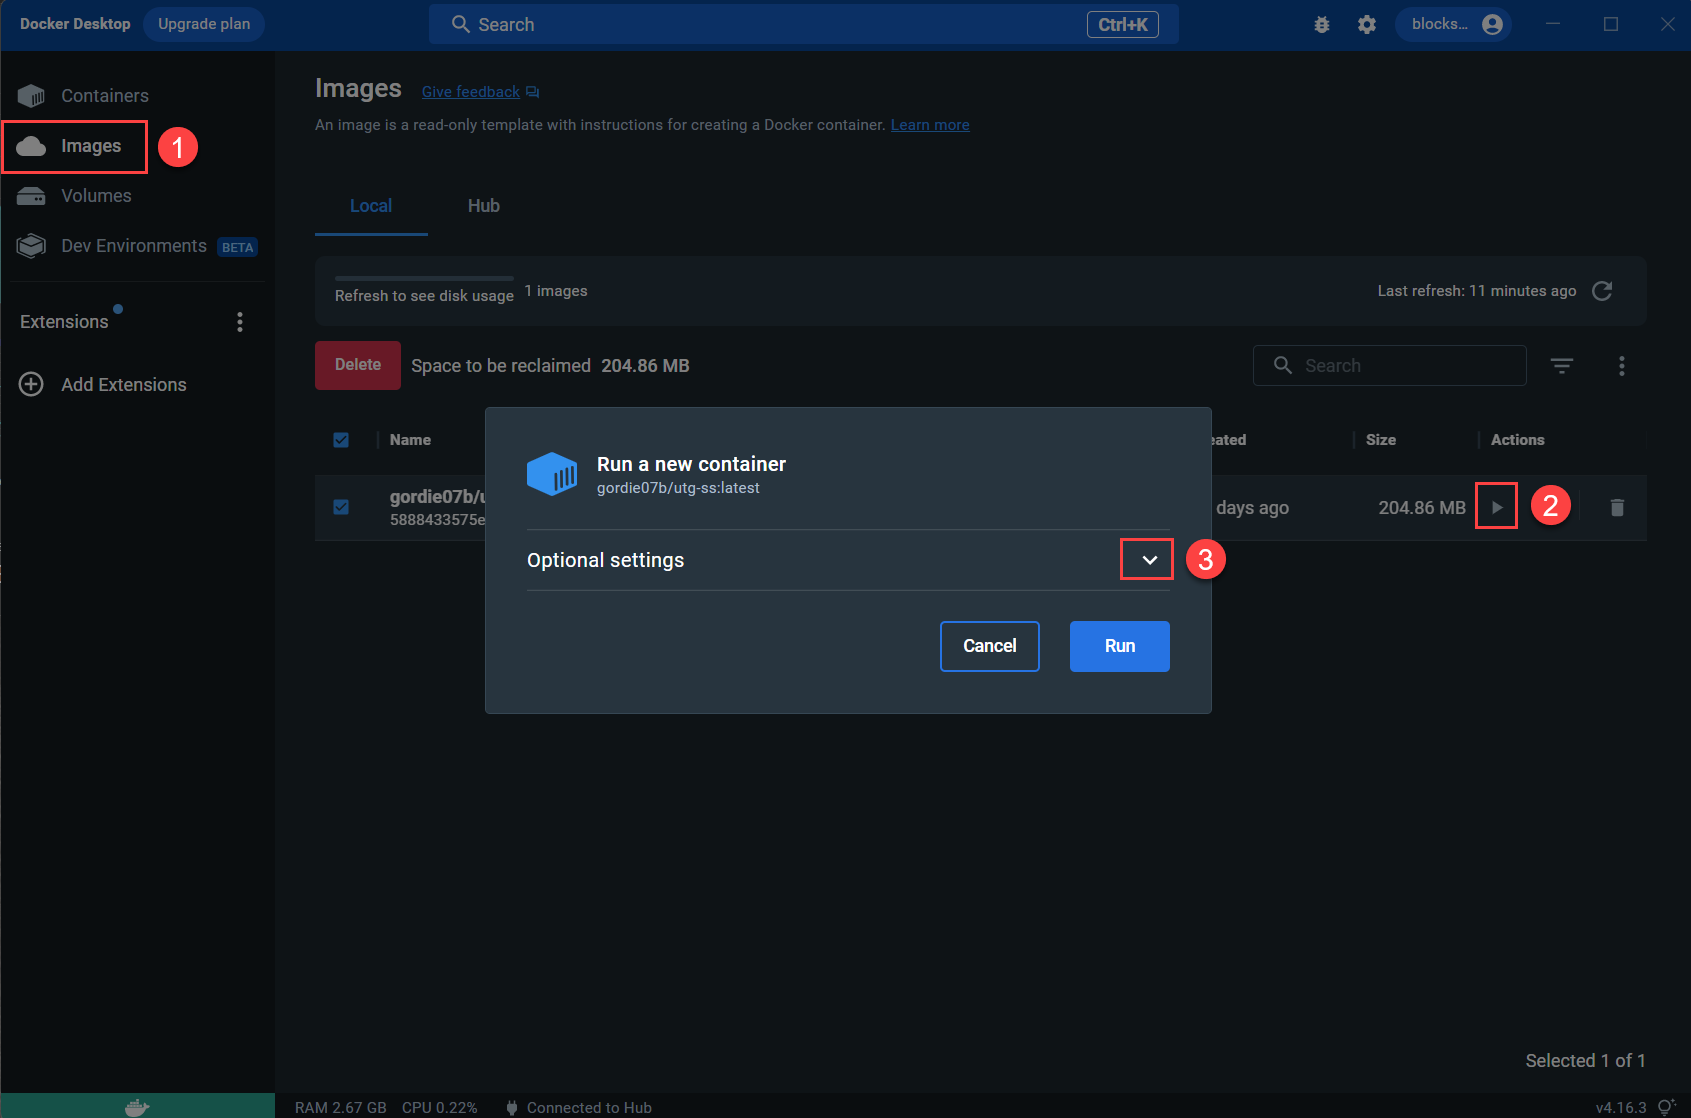
Click on Images on the left navigation pane.
Click on the Run button, which will bring-up the Run a new container dialog box.
Click on the Optional Settings dropdown button where you will configure the container.
The image will take a few seconds to download to your computer. Once the image has downloaded successfully, do the following:
Click on Images on the left navigation pane.
Click on the Run button, which will bring up the Run a new container dialog box.
Click on the Optional Settings dropdown button where you will configure the container as follows:
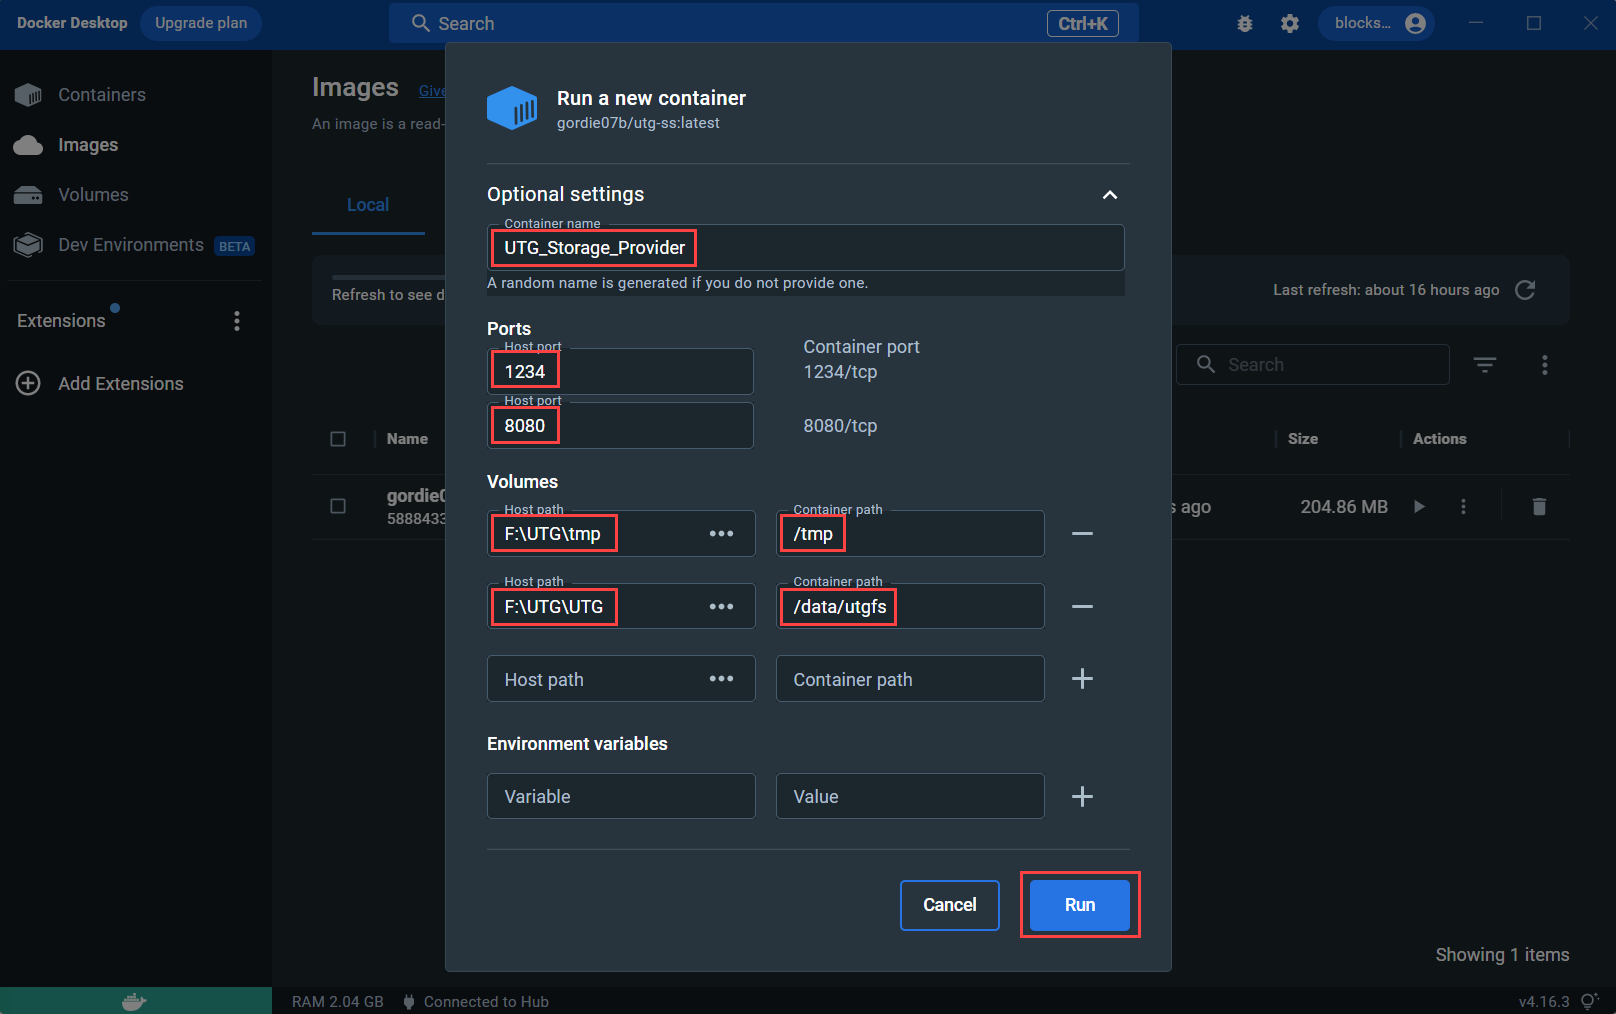
Enter a descriptive name for in the
Container namefield. In this example, it is UTG_Storage_Provider.In the
Host portfields, enter 1234 and 8080 respectively.In the Host path fields uner Ports, you will specify the location of the storage you want to share.
- You will first need to create 2 subdirectories on the drive you are using to share storage, named \tmp and \utg respectively.
- In
Host Path, enter the path to the \tmp directory you created in the above step. - In
Container path, enter /tmp - Click on the + icon, which is located to the right of the path you just entered, which
will create another
Host PathandContainer pathline. - In the new
Host pathfield, enter the path to the \utg directory you created earlier. - In the new
Container pathfield, enter /data/utgfs.
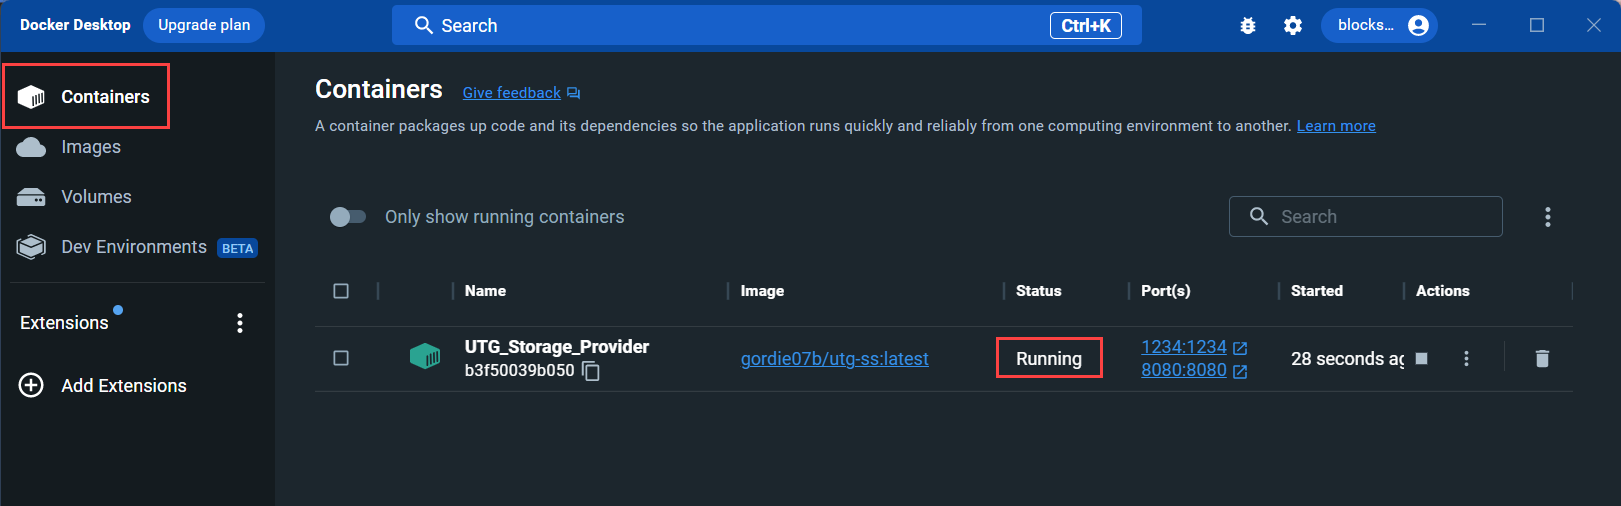
Click on the Run button to start your Storage Provider container.
- Navigate back to Containers in Docker Desktop, and you'll see that your container is now running.
Next Steps
Congratulations, you've successfully deployed your UltronGlow Docker image on your computer! Continue on to the Next Step to connect your Docker image to UltronScan and rent your storage on the Storage Market.