Prepare & Rent Storage
In order to rent storage on the UltronGlow Storage Market you will need to reserve a portion of your disk (seal) for rental. Sealing sets apart the amount of storage you select that will be encrypted when rented, and only accessible to the renter. This ensures the renter's data is private and that you don't accidentally delete it.
This guide provides instructions to seal a portion of your storage for rental on the Storage Market.
Prerequisites
- Complete the Connecting to Ultronscan tutorial.
Steps
1. Seal storage for rental
Navigate to Ultronscan
Click on Tools.
Click on Storage Service Node Management.
If you forgot how to retrieve the IP address of your server, refer to Step 1 in the Connect to Ultronscan tutorial.
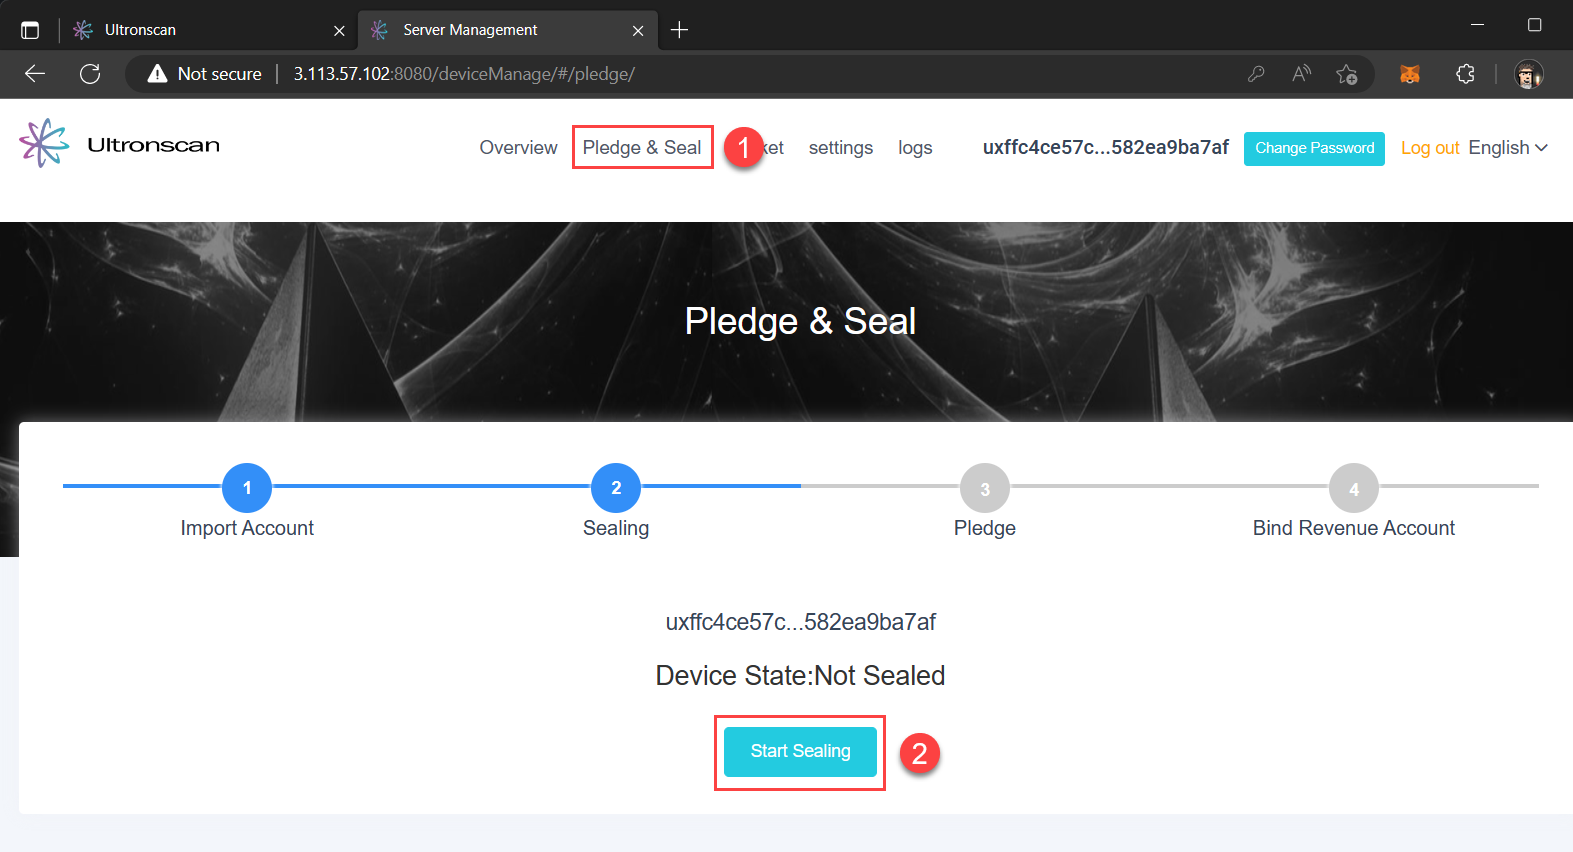
In the Server Management tab in your browser that pops-up, start the sealing process by:
Click on Pledge & Seal in the top navigation bar of the site.
Click on the Start Sealing button.
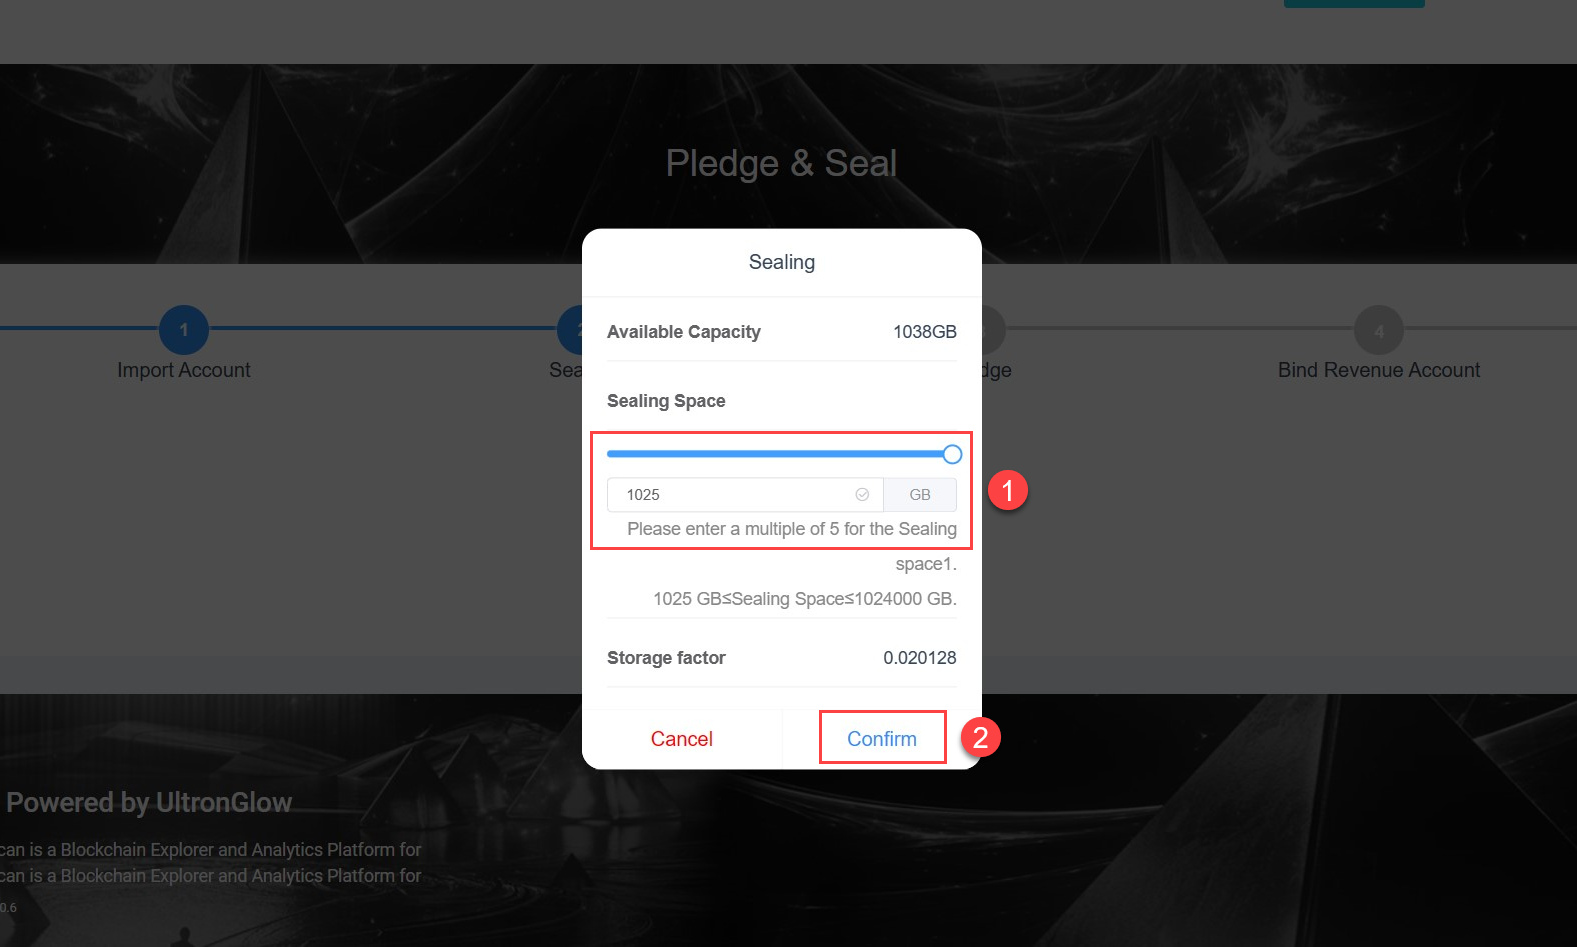
Determine the amount of storage you want seal and make available for rent.
Click the Confirm button to start the sealing process.
Depending on how much storage you chose to seal, the sealing process can take a long time. 1 TB of storage sealing can take up to 2 hours on a computer with a fast SSD, or longer if using a HDD.
During the sealing process, be sure not to reboot or turn off your server as this will cause the process to start over again once the server has rebooted.
2. Set Rental Terms and Pledge
Once completed, click the Next button on Server Management page, which will then bring up a dialog asking you to configure your bandwidth and rental settings.
- Run a speed test to determine how much uplink bandwidth you have available.
The UltronGlow network will periodically test to see if the bandwidth you pledged is available. Be sure to set the limit to an amount that factors in your daily usage.
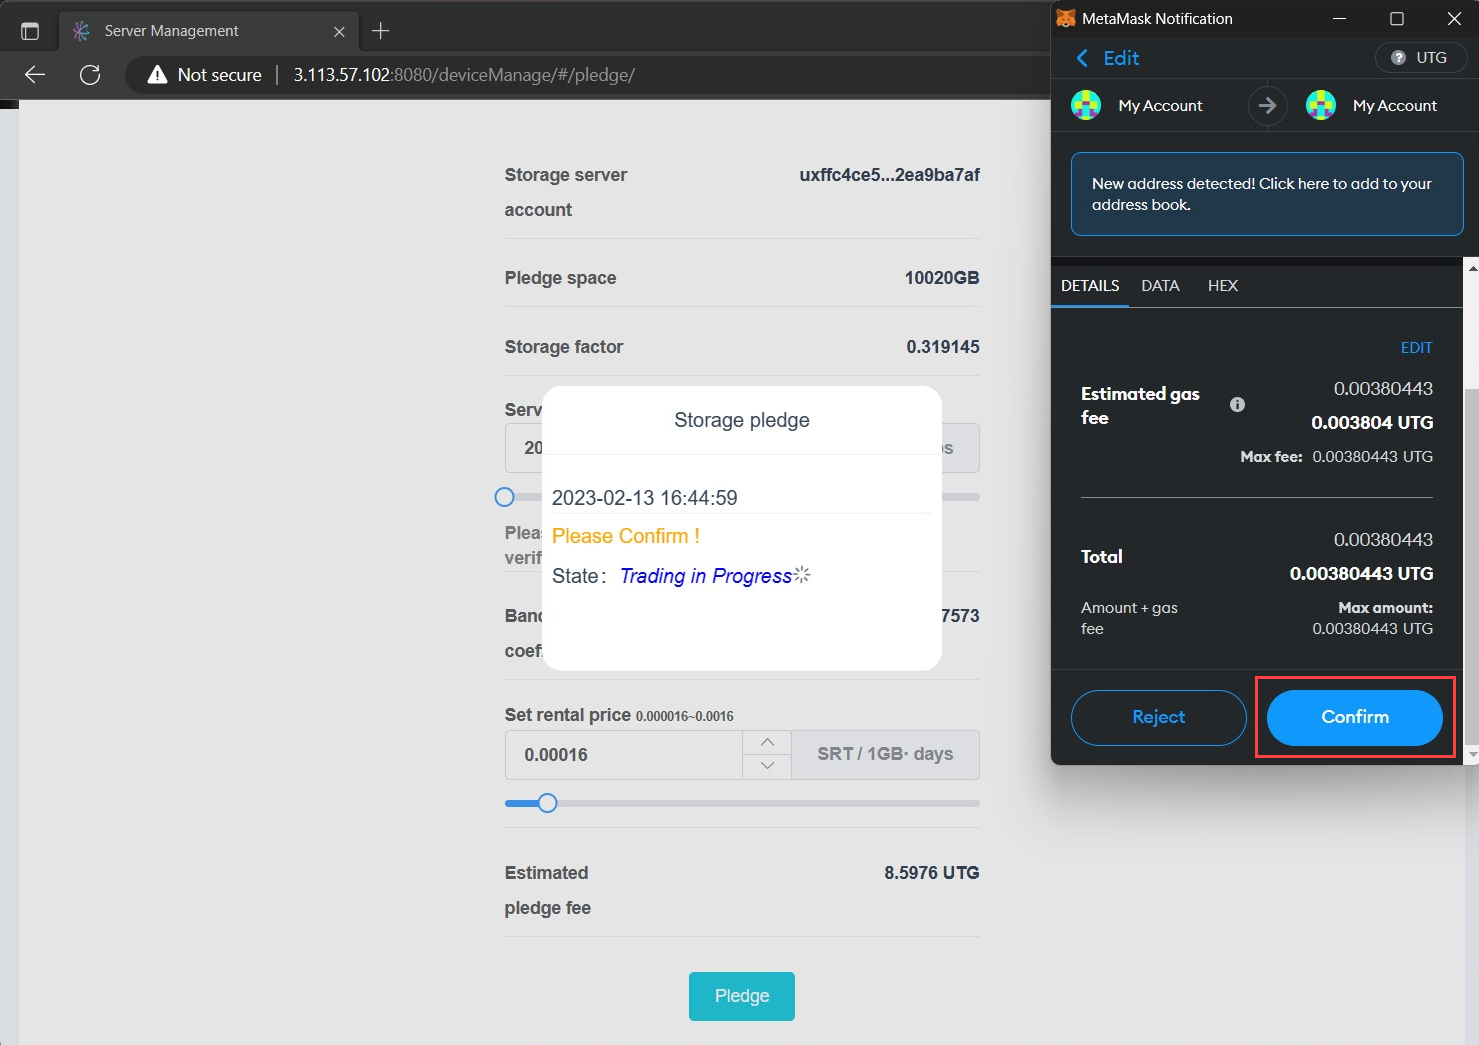
Set a rental price in SRT that you will charge for your storage rental. It's helpful to consider what others are charging to determine a competitive rate.
Click the Pledge button to proceed to the next step.

A MetaMask prompt will appear asking you to confirm your transaction on the UltronGlow network.
Click the Confirm button in MetaMask, and congratulations - your storage is now rented on the UltronScan Storage Marketplace.
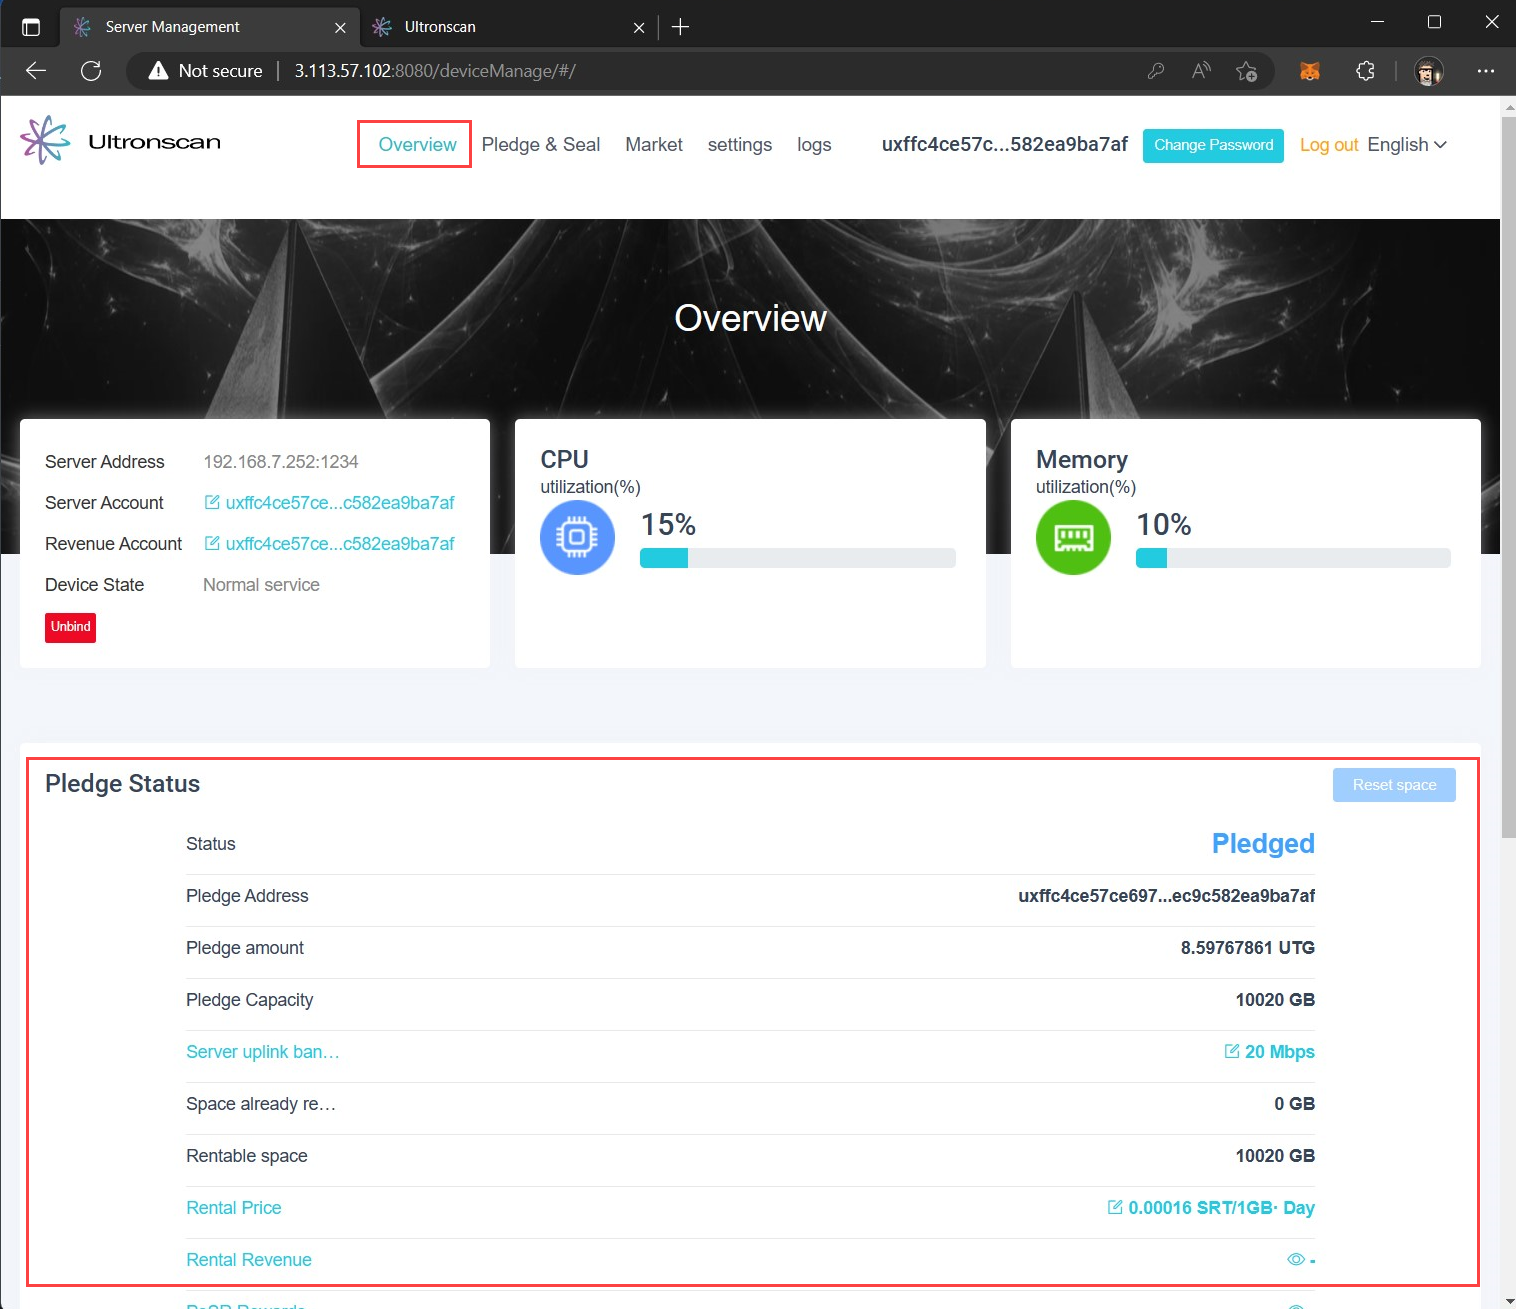
Once the transaction has confirmed on the network (which may take a minute or two), Overview, found on the top navigation bar, is where you can view your Pledge is committed, the terms of the rental, and rental status of your space.
Next Steps
Congratulations, you've successfully sealed and rented your storage on the UltronGlow Storage Market!
Continue on to the Next Step to see if someone has rented your storage and configuring your server for them access and store files!